The windshield hasn’t been too bad. I’m at the point where everything is a one-off but that’s OK…because I kind of like building this boat.
Here’s the objective – as you can see geometry is important here (thank you Mr. Hull!)

The first step was building the windshield knee. I glued up some leftover face-grain planking, planed it to 1 3/4″ thickness and then cut a shape that looked like the plans. I then rounded over the edges. The most important part was getting the angle right, about 30 degrees, and then matching the bottom so that it was flush against the deck.

After attaching the knee, I cut and attached the centerpost and bottom runners. I cut a 15 degree angle fore to aft on the centerpost outer face, as well as routing a 1/4″ groove about 1/2″ deep. This centerpost groove, as well as an accompanying one in the runners, will receive the acrylic windshield. The angles were also 15 degrees fore to aft. The most important step here was to make sure I was properly aligned with the boat’s centerline on both the windshield knee and the knee-to-centerpost attachment point

Next step was to attach the side posts and align with the bottom runners. I wanted them to be the same distance and same angle from the centerpost. They also got 1/4″ routing grooves that were 1/2″ deep, for the side windshields as well as for the main windshield. I had a scrap piece of acrylic that I laid in the grooves to make sure everything lined up.

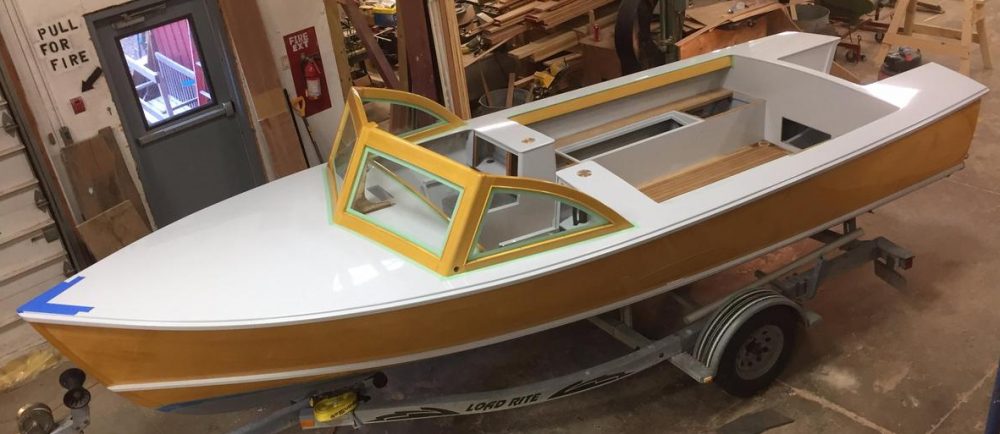
I then finished the tops and slid in the acrylic. I thought an angled look would be better for the side windshields but quickly changed my mind upon seeing it from a distance.

I then decided to steam two top runners for the side windshields. I routed a groove and then steam bent them to the same shape. After they dried, I attached them, which involved some angled cut adjustments to the bottom runners along the gunwales.


My biggest lesson on this part of the build was my choice of sealant. I used a flexible, clear silicon for the acrylic to nest in, which would’ve been OK if it wasn’t so tacky and didn’t smear everywhere. But I was able to get most of the smearing off with mineral spirits and a toothbrush. It took a while though.
Next step is to epoxy the windshield; the epoxy coat will lock in the shape and fill any voids. Forward progress!


